引言
用 swagger2 来生成接口文档,让我们脱离了传统的手写文档的模式,它可以轻松的整合到 Spring Boot 中,用很少的代码就能生成一份漂亮的文档,同时让维护文档和修改代码整合为一体,可以让我们在修改代码逻辑的同时同步维护接口文档。另外 Swagger2 也提供了强大的页面测试功能来调试每个 RESTful API。具体效果如下图所示:
![swagger]()
下面来具体介绍如何集成
首先需要创建一个 springBoot 项目
第一步:添加 Maven 依赖
1
2
3
4
5
6
7
8
9
10
11
| <dependency>
<groupId>io.springfox</groupId>
<artifactId>springfox-swagger2</artifactId>
<version>2.9.2</version>
</dependency>
<dependency>
<groupId>io.springfox</groupId>
<artifactId>springfox-swagger-ui</artifactId>
<version>2.9.2</version>
</dependency>
|
第二步:新增 Swagger 配置类
1
2
3
4
5
6
7
8
9
10
11
12
13
14
15
16
17
18
19
20
21
22
23
24
25
26
27
28
29
30
31
32
33
34
35
36
37
38
39
| @Configuration
@EnableSwagger2
public class SwaggerConfig {
@Value(value = "${swagger.enabled}")
private Boolean swaggerEnabled;
@Bean
public Docket createRestApi(){
return new Docket(DocumentationType.SWAGGER_2)
.enable(swaggerEnabled)
.apiInfo(apiInfo())
.select()
.apis(RequestHandlerSelectors.withMethodAnnotation(ApiOperation.class))
.paths(PathSelectors.any())
.build()
.pathMapping("/");
}
private ApiInfo apiInfo() {
return new ApiInfoBuilder()
.title("Swagger Demo")
.termsOfServiceUrl("")
.contact(new Contact("zhuo","https://github.com/zhuyizhuo","xxx@gmail.com"))
.version("1.0")
.description("演示 swagger 文档")
.build();
}
}
|
第三步:在接口上添加 Swagger 注解
1
2
3
4
5
6
7
8
9
10
11
12
13
14
15
16
17
18
| @Api(tags = "Demo 文档")
@RestController
@RequestMapping("/demo")
public class DemoController {
@ApiOperation(value = "打招呼",notes = "这是接口 notes!",httpMethod = "GET")
@ApiImplicitParam(dataType = "string",name = "name",value = "姓名", required = false)
@GetMapping("/hello")
public String hello(String name){
return "Hello " + name + "!";
}
@ApiOperation(value = "添加用户",httpMethod = "POST")
@PostMapping("/add")
public String addUser(UserInfo user){
return "Add User Success!" + user;
}
}
|
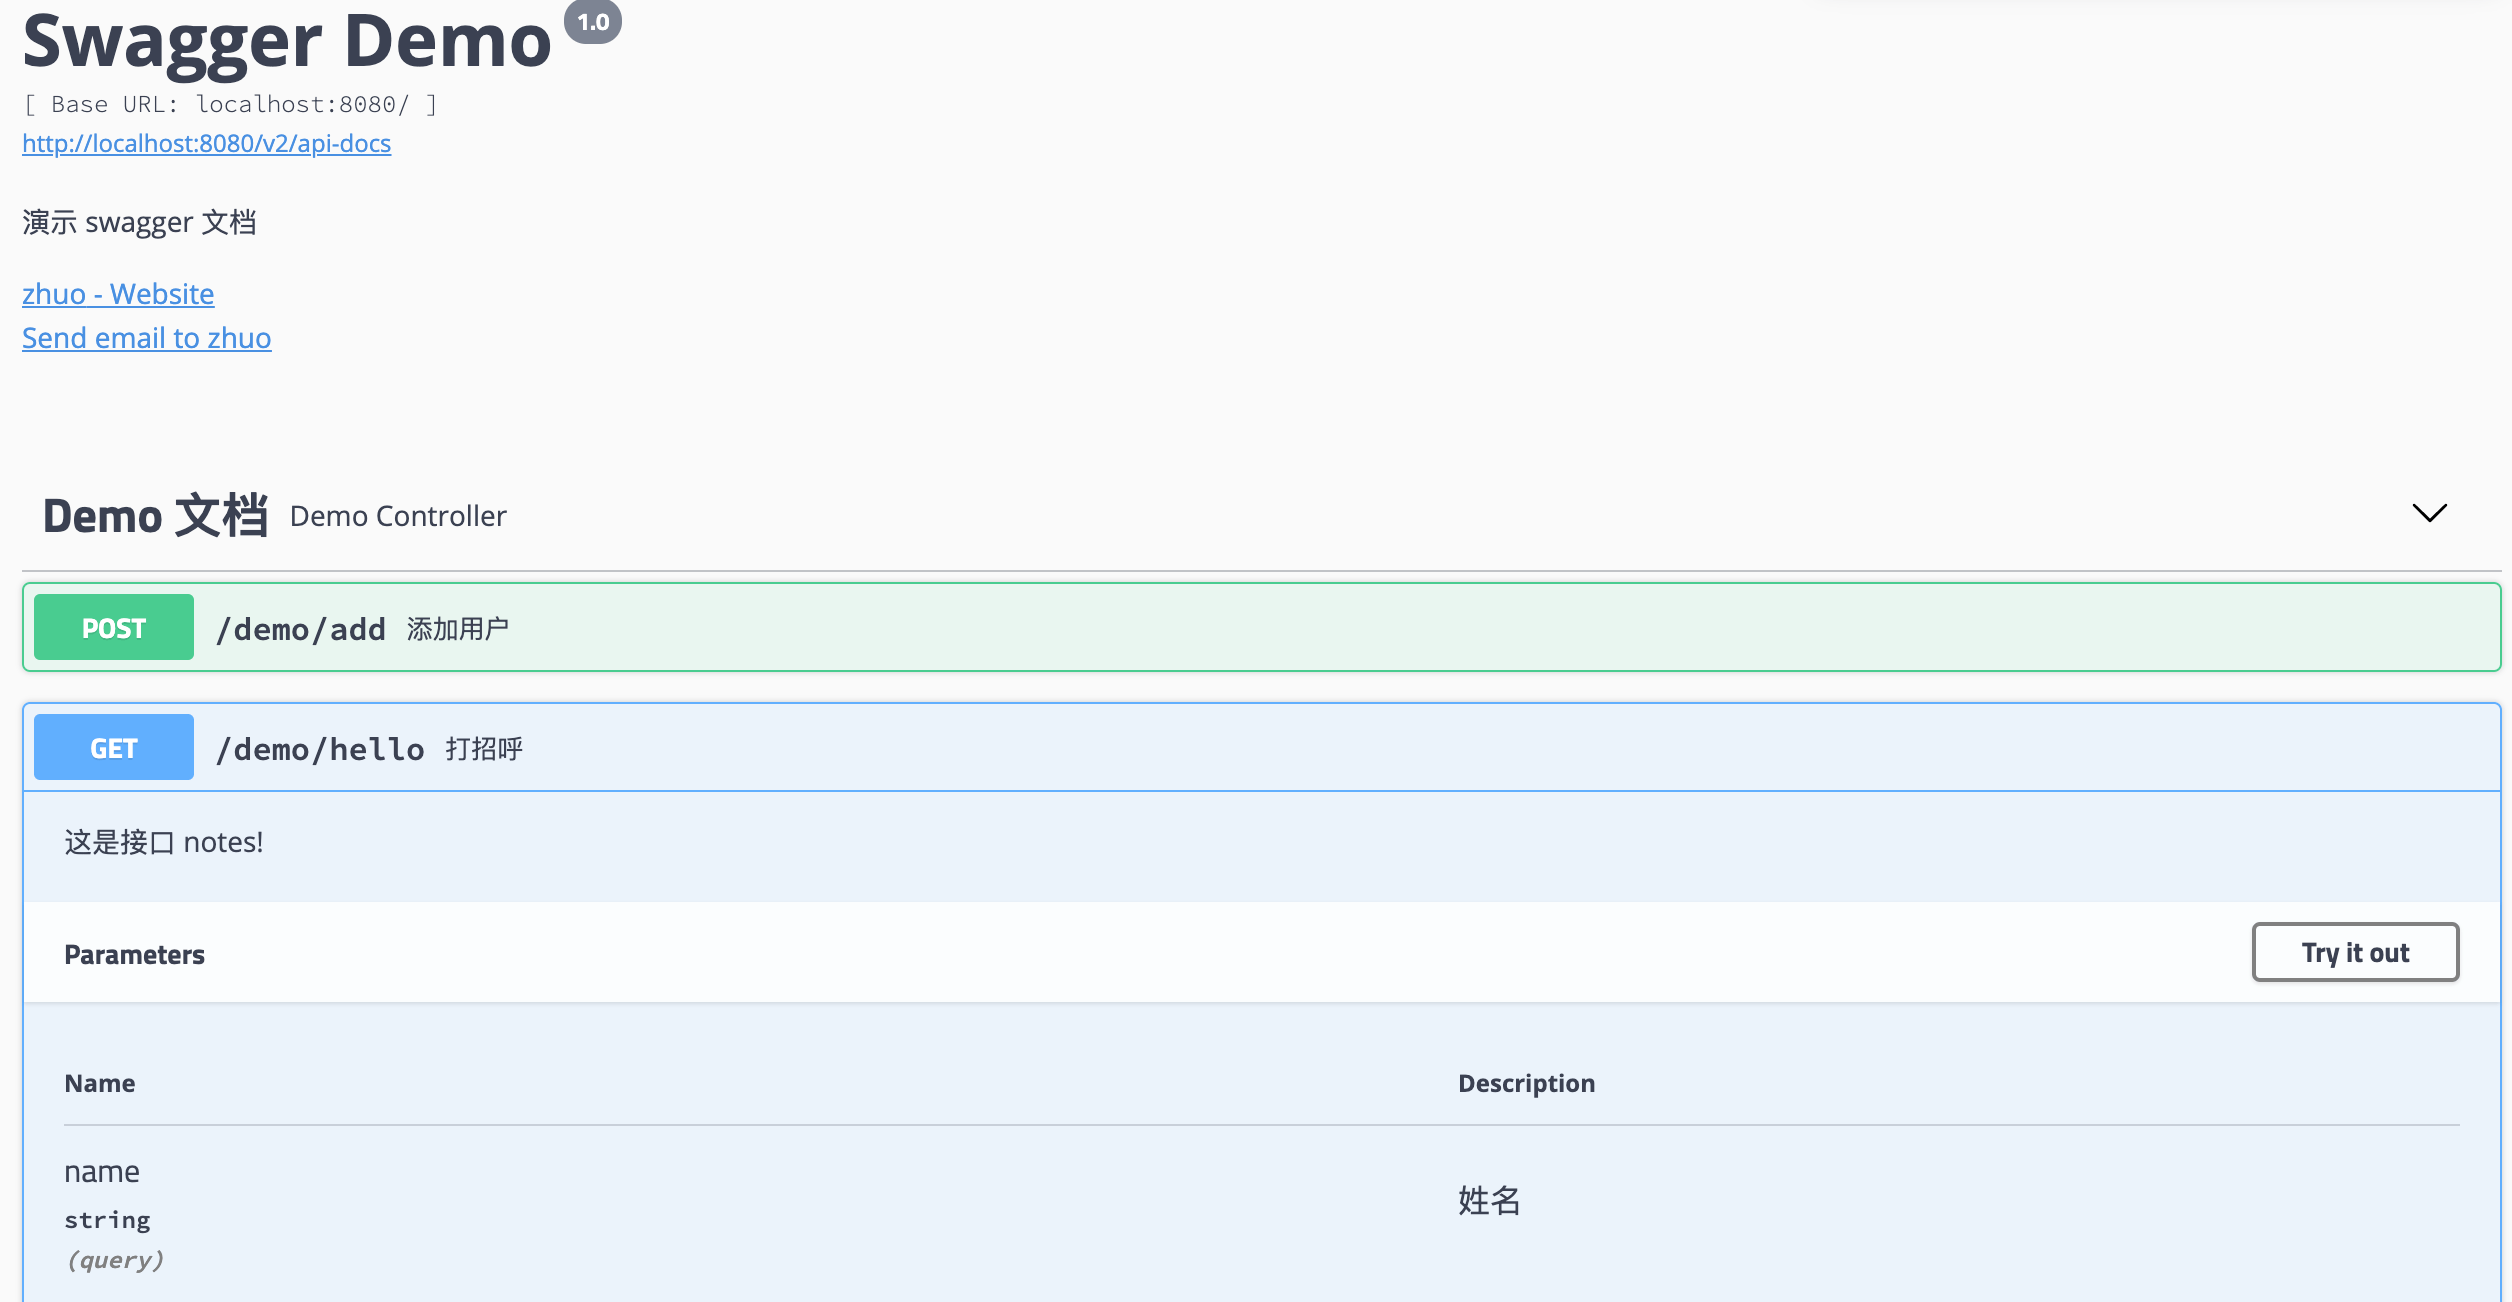
第四步:启动应用,访问:http://localhost:8080/swagger-ui.html,就可以看到如下的接口文档页面:
![swagger1]()
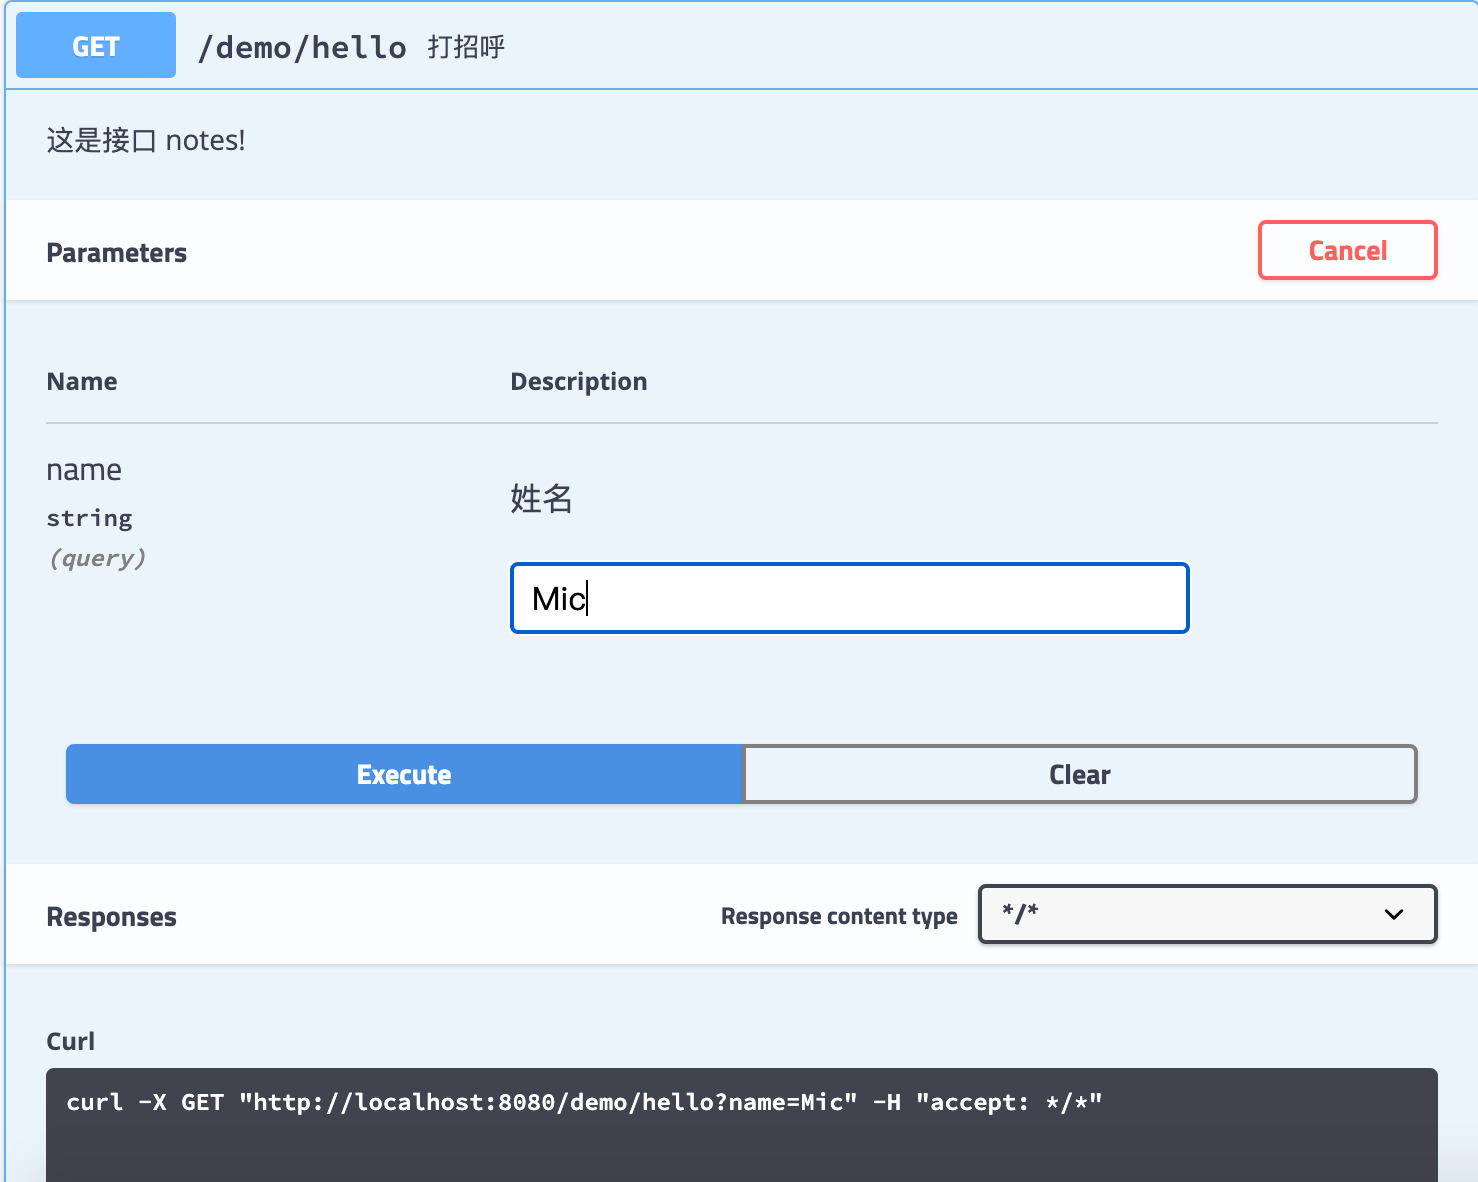
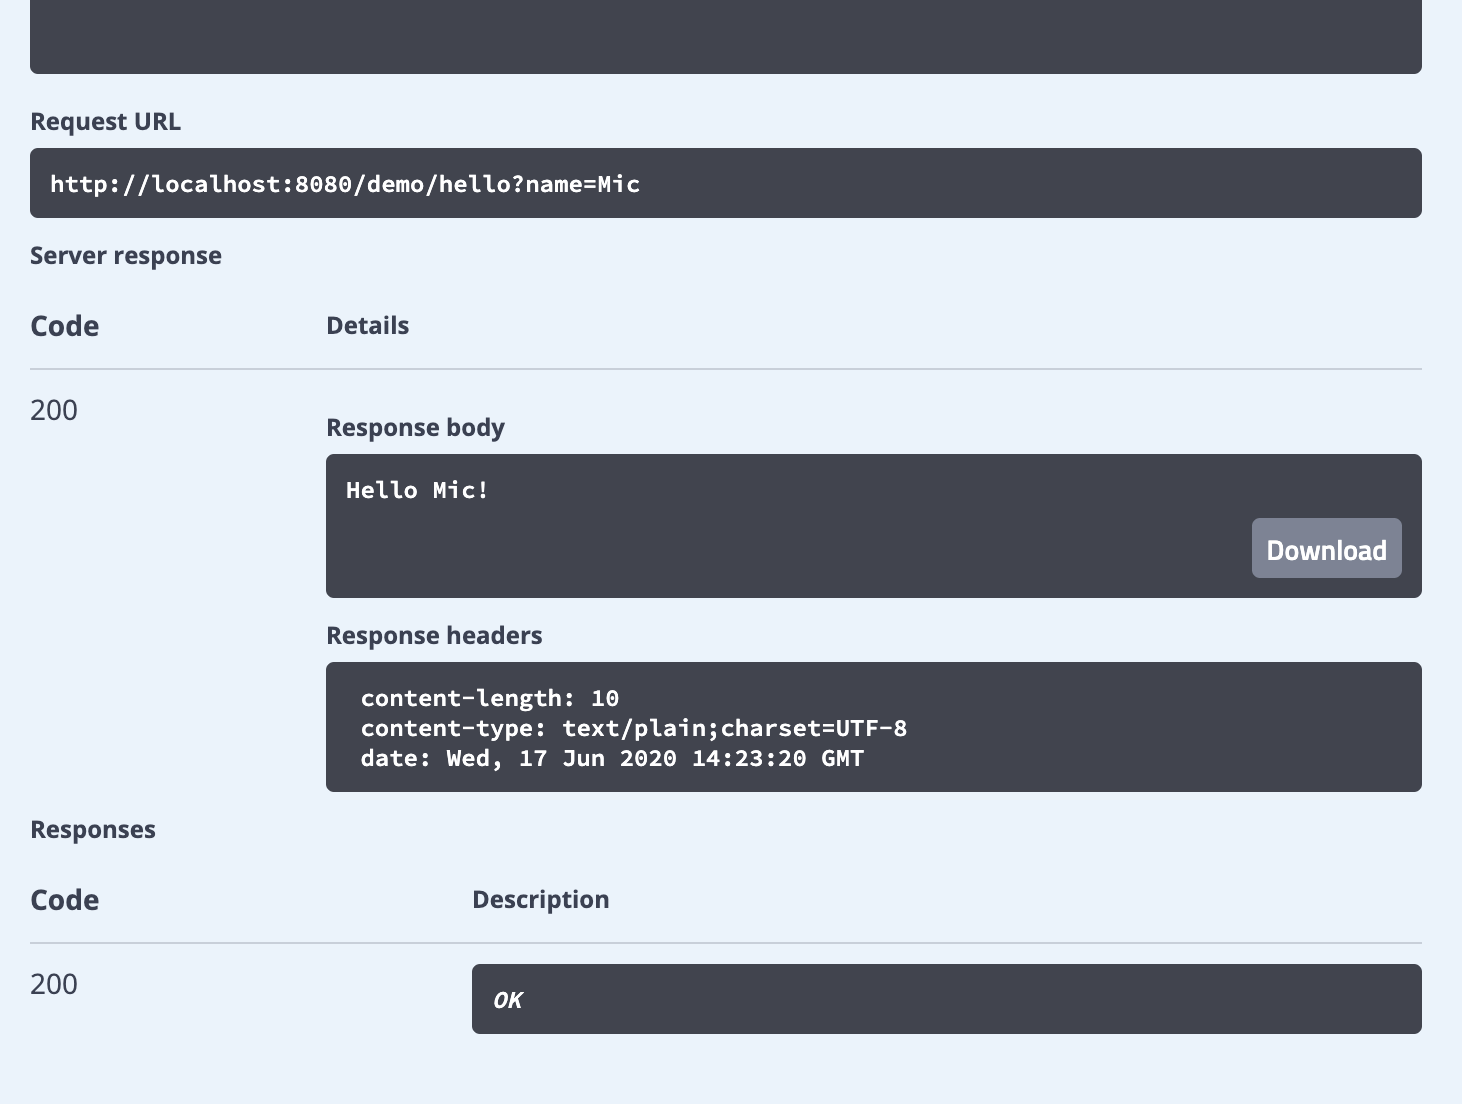
Swagger 调试接口
Swagger 除了查看接口功能外,还提供了调试测试功能,我们可以点击上图中的 try it out 按钮:此时 name 右侧就变为输入框,我们只需要填入参数,点击下方 Execute 按钮,即可完成了一次请求调用!如下:
![try1]()
![try2]()
见识了 Swagger 的强大功能之后,是不是以后编写接口文档 So Easy 了呢?
代码示例
本文的完整工程可以查看下面仓库中的spring-boot-samples-swagger目录:
- Github:https://github.com/zhuyizhuo/spring-boot-samples/
- Gitee:https://gitee.com/zhuyizhuo/spring-boot-samples/
如果您觉得本文不错,欢迎Star支持,您的关注是我坚持的动力!